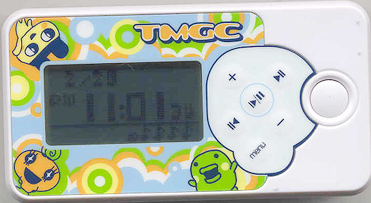
Tamagotchi Music Fever
Record (the icon that says "REC")
High - Best quality setting. Only allows you 60-70 minutes of recording time, but it sounds the best.
Medium – Next best recording quality. (I will get back with you on the recording time)
Low – Not the greatest quality. The amount of time offered might seem tempting, but the quality, I assure you, is not great.
Recording Directions
You will need a set of headphones, the Music Player, any CD’s or tapes with your music on them, a stereo that has a standard (small, 1/8 inch) headphone jack and the white connection cable provided. (the headphones provided are cheap and won’t last long, so a second pair is recommended)
Once you have all of the items needed, plug the headphones into the Music Player where it’s marked "Phones". Then plug the white connection cable into the other jack marked "REC", and plug the other end into your stereo headphone jack. It is important that you remember not to adjust the Music Player’s volume during this time. (it should be set on 7-9 volume for recording)
Next make sure your tape or CD is in your stereo and that the volume is low. Select the "REC" option on your Music Player and select the quality you’d like. (note at this time it will show you how many minutes are available for each setting) Once you’ve decided on the quality you’ll need to test the stereo volume. (Do Not Press Record on your Music Player until you’ve set the volume of the stereo.)
Turn on your music on your stereo and adjust the stereo’s volume until you can hear it clearly through your headphones. (Do not worry about making it loud, you’ll be able to adjust the music later on. And if you make it too loud the music will be really scratchy and distorted)
Once you have the stereo volume where you want it, restart your music, but pause it before the song starts. On your Music Player, with the quality setting selected, press the "Play/Pause" button to begin recording. As you press the button un-pause your music and it will begin to record.
After your song is done, press the "Play/Pause" button on the Music Player to end the recording, then pause your stereo. You will now be able to name and save your song. At first the letters will be in Japanese. Use the "Skip" buttons to scroll through the letters. (Note: there’s ABC, 123, BS, and OK in the bottom right corner. ABC – English letters. 123 – Numbers and Symbols, also the Space choice. BS – Backspace. And OK – Confirms Text Entry. An easy way to get to the ABC is to scroll backwards with the left Skip button.)
You should have successfully recorded your first song on your Tamagotchi Music Fever. (Also note that you will not be able to access the Dance Mode or Game Mode until you’ve recorded at least one song since music is required to play.)
Do the same for any additional songs you’d like to record. The Music Player will let you know when it cannot hold any more songs.
Dance Mode (the musical note icon)
Band Stage – The tamagotchi that you’ve selected plays their instrument on the stage. You press the white button to make them play a note during the song. I won’t spoil it by telling you which ones they play. I’ll let you figure that out on your own.
Dance Stage – When you first start your Music Player there will only be one dance background available out of six. The others can be unlocked by gaining points in the "Game Mode"
Game Mode (the icon that looks like a game boy)
Surfing/Wave Riding – Your selected tamagotchi character will either ride in an inner tube, on a surf board, or on water skis. You must press the White button to make them jump over large waves. You only have 3 lives, so be very careful. If you can successfully complete the game and/or achieve a high number of points, you will unlock secret tamagotchi characters or dance backgrounds.
Trampoline – Your tamagotchi must jump and catch the goodies that float across the top of the screen, but watch out for Poo. There’s a health meter across the bottom of the screen. Watch it carefully, cause when it empties your tamagotchi will fall. You can keep filling the meter by getting the food/treat items. But the poo will cause your meter to empty quickly. If you can successfully collect all the goodies and keep your meter filled up within the time limit you will win the game. By winning and/or getting a high score you can also unlock additional tamagotchi characters and dance backgrounds.
Character Select (the icon with the two tamagotchi faces)
When you start up your Music Player there are only three characters to select from. (Memetchi, Kuchipatchi, and Mametchi) You can scroll through those three and choose which one you’d like to use on the Game Mode or the Dance Mode. If you use all three in the Game Mode there’s a greater chance that you will unlock more secret items. If you use them in the Dance Mode each tamagotchi will play a different instrument.
Settings (the wrench icon)
There are four options
First – Song Edit – You can change the name of your songs at any time under this option.
Second – Delete Song – You can delete unwanted songs here. It will ask you to confirm the delete twice.
Third – Date and Time – Here you can reset or adjust the date and time.
Fourth – Contrast – Use this setting to lighten or darken the screen.
If you don’t wish to play the Dance Mode or Game Mode, but you do just want to listen to your songs, at the screen with the 5 icons just press the "Menu" button and you can play all of your songs. And just like a regular CD, iPod, or MP3 player, you can select whichever song you want to listen to, and skip songs as you like. (It will not prompt you to choose a song like the Dance and Game Mode. It will just play all of the songs you have recorded)
Also if you are not playing a game on the Music Player or listening to your music, the Date/Time Screen will show up in a few seconds of being idle.
Info courtesy of Sarah H.